Repairs - Finish repair and invoice
Repairs - Finish repair and invoice
Ending repair and creating invoice.
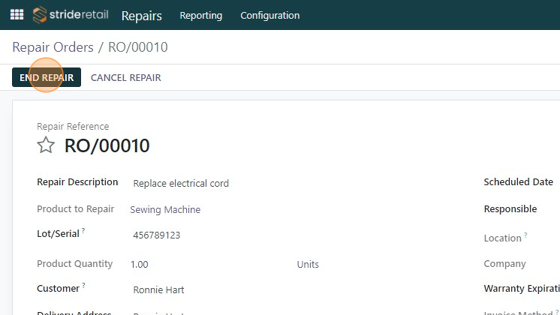
1. Navigate to the repair order. Ensure all notes (internal and external) have been added. Click "END REPAIR"
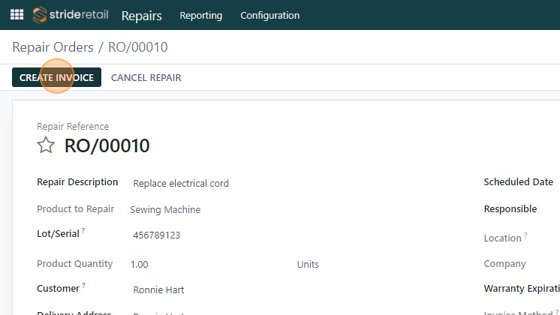
2. Click "CREATE INVOICE"
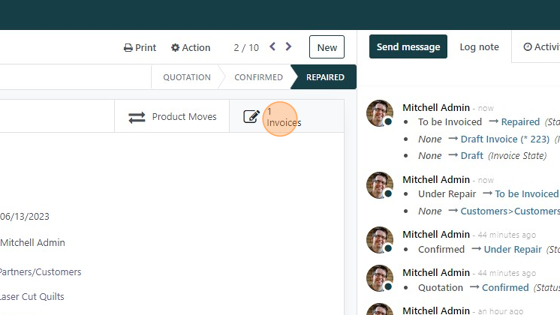
3. Click "Invoices" tab in the repair order
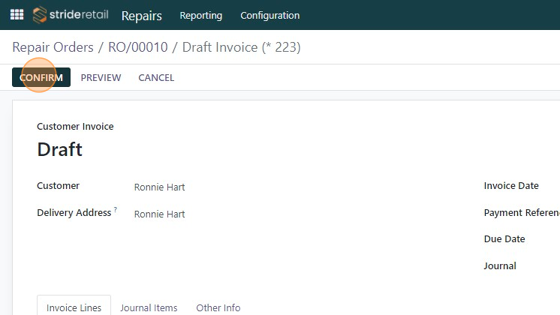
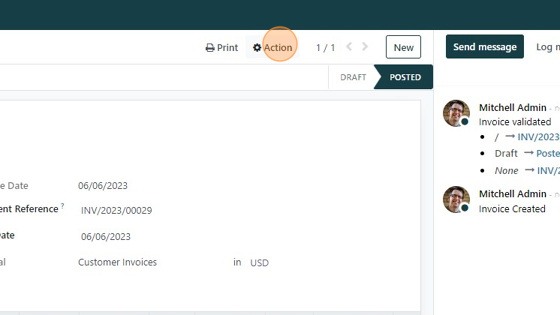
4. Click "CONFIRM" to confirm the invoice.
5. At this point you have several options. 1.) If you are configured to take online payment for invoices and sales orders you can email a copy to your customer and they can pay for the repair online. 2.) If you want to you can take a payment over the phone by following the "Stride Payments" steps 3.) Notify customer that the product is ready for pickup where they can pay for it in store. See "POS settle Invoice" for instructions on settling an invoice at the Point of Sale.
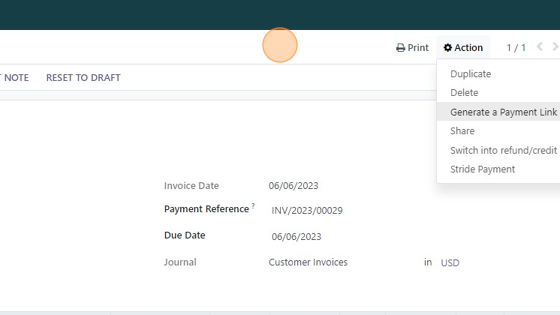
6. Stride Payments: Click "Action"
7. Select "Stride Payments" enter customer credit card information.
8. To notify customer Click "SEND & PRINT". If you are configured to take online payments customers will get a payment link. Otherwise they will be notified that they have an invoice for the repair services.

9. Click "SEND & PRINT" after making edits to the outgoing email.
