Inventory Adjustment via Excel Spreadsheet
How to Export and Import Inventory Adjustments in Stride Retail
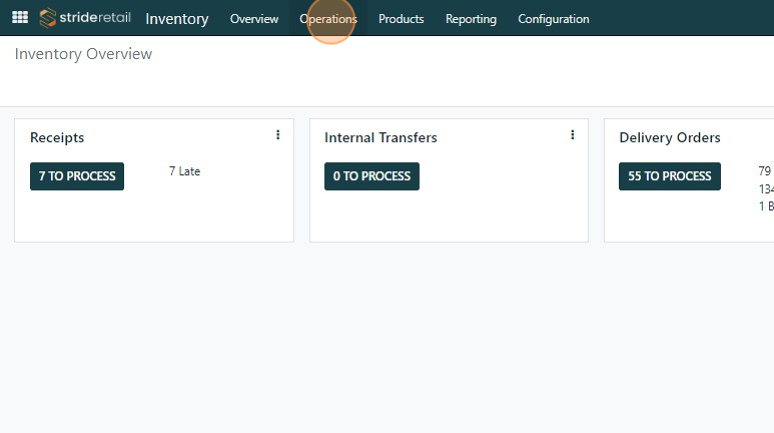
1. Go to the inventory

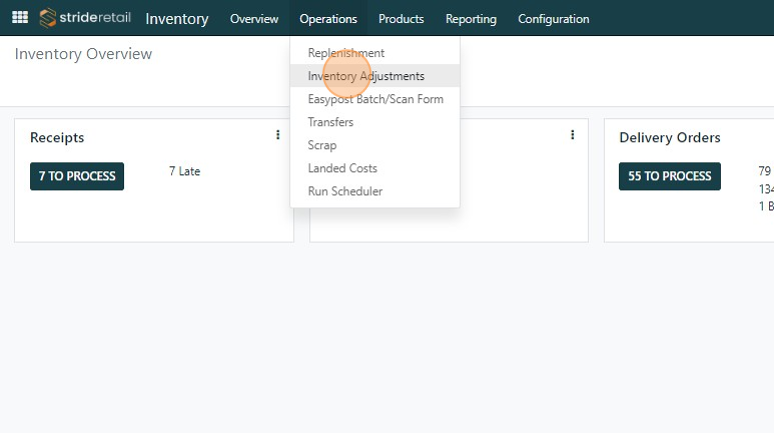
2. Click "Operations"
3. Click "Inventory Adjustments"
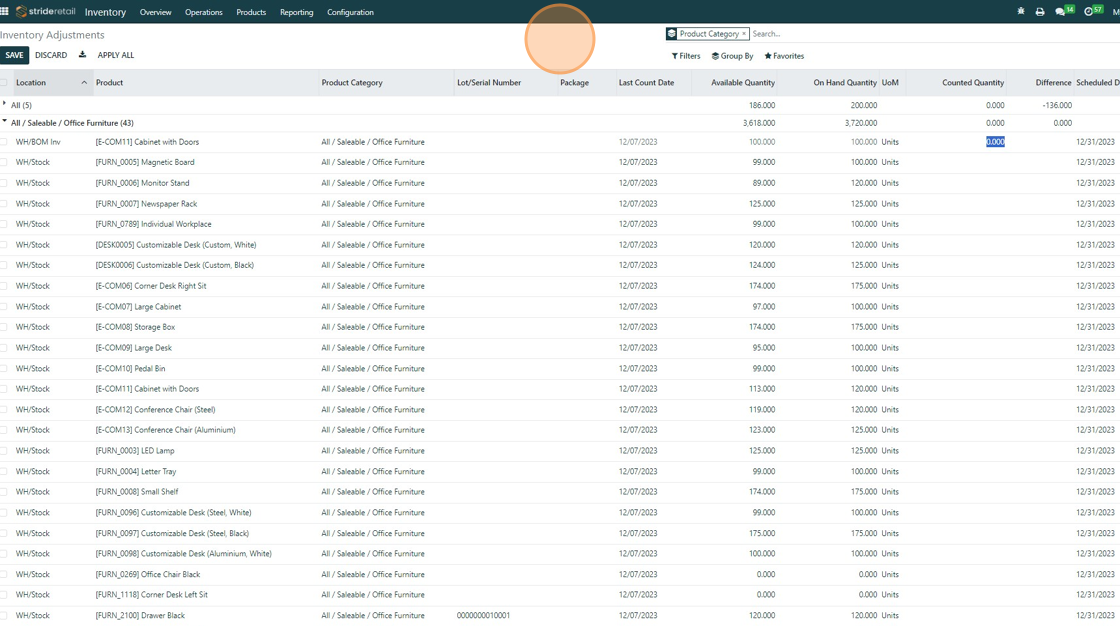
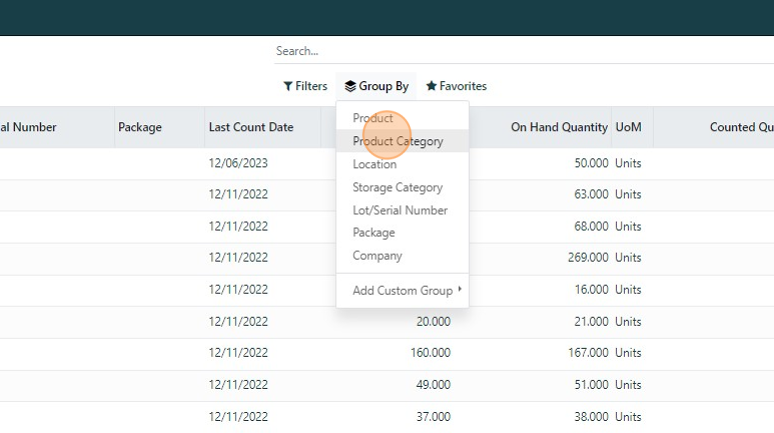
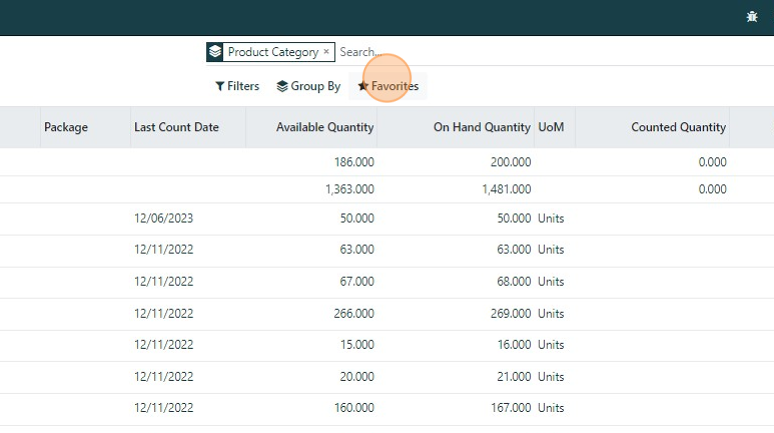
4. Click "Group By">"Product Category"
5. Click here to expand the group
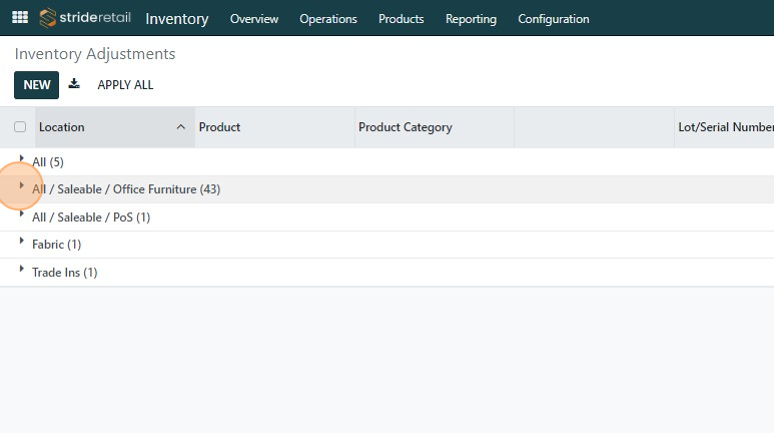
6. Click this checkbox to select all the items in this category.

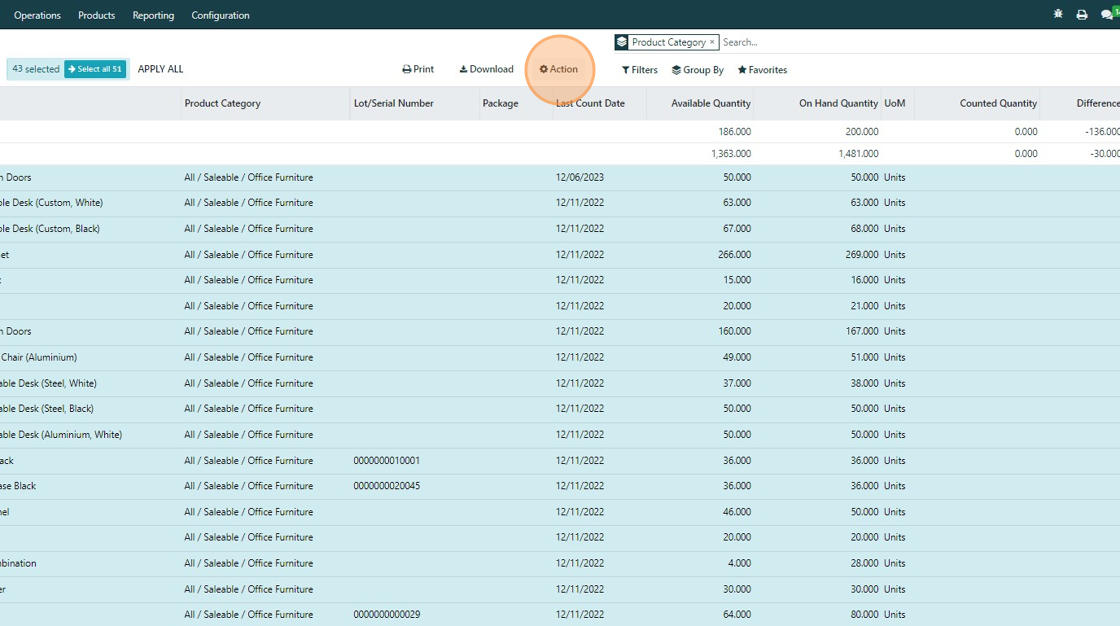
7. Click "Action"
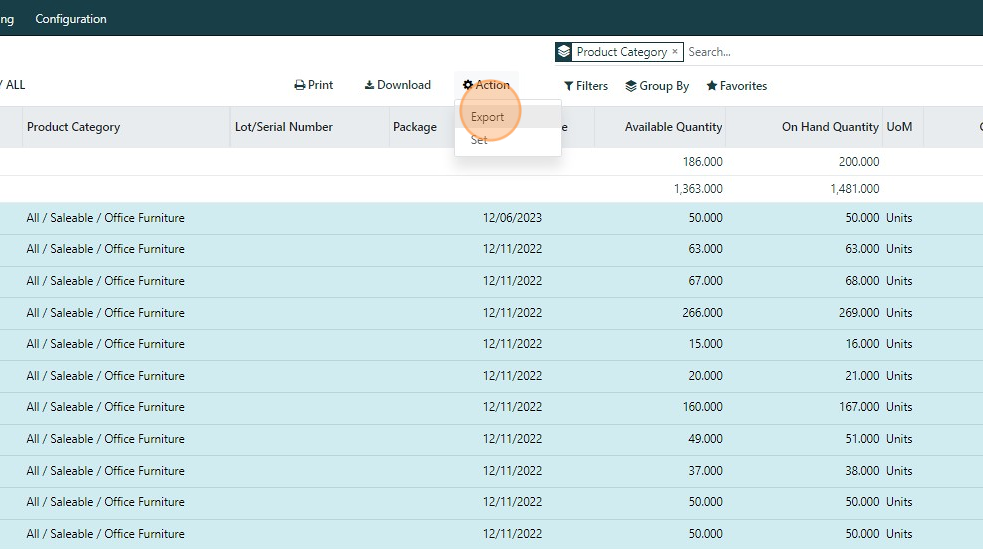
8. Click "Export"
9. IMPORTANT! If you want to import the spreadsheet you will need to click the field shown below. If you are going to hand type in the counted quantities then you don't need this field.
Click the "I want to update data (import-compatible export)" field.
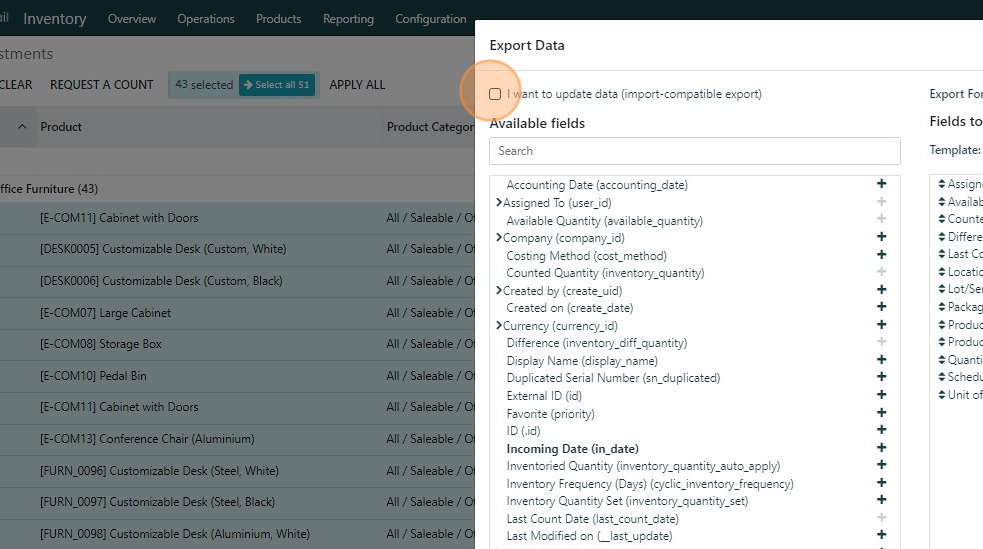
10. You can move fields and remove fields you don't want. Click here to drag and rearrange fields.
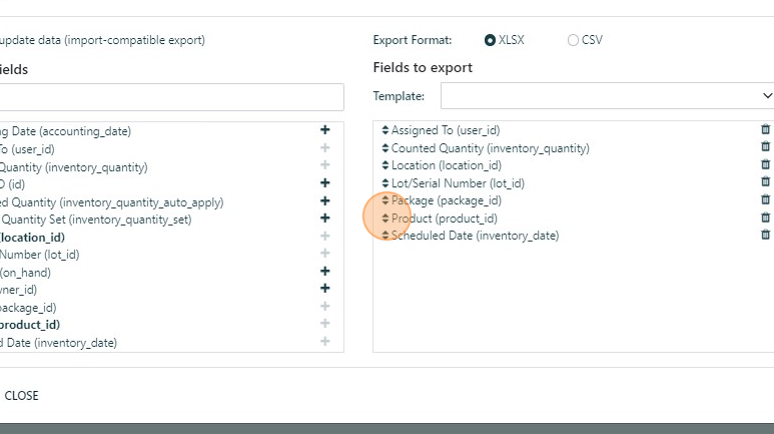
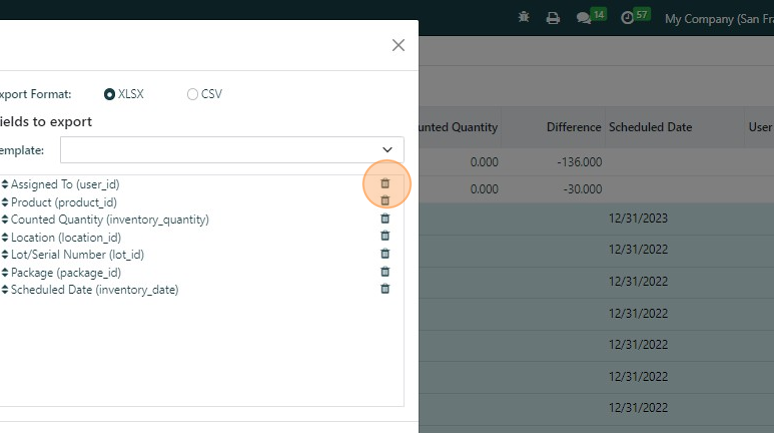
11. Click here to remove a field.
12. Click here to add fields.
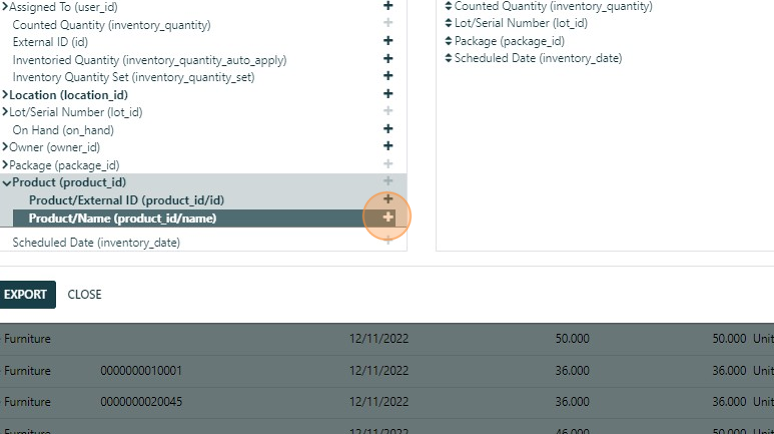
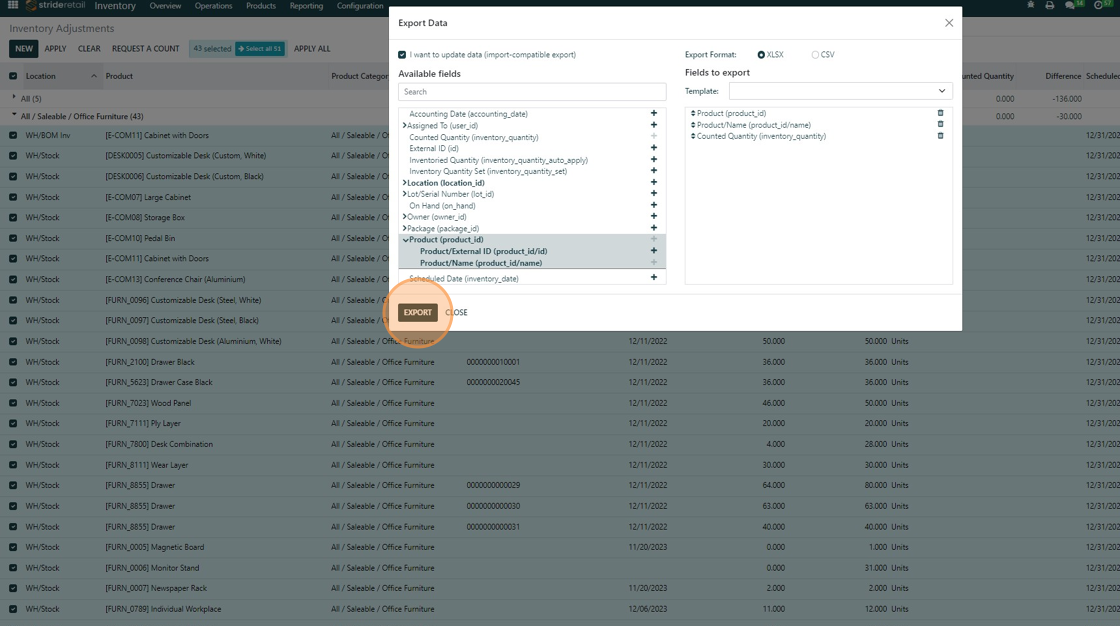
13. Once you have the fields you want on your list Click "EXPORT"
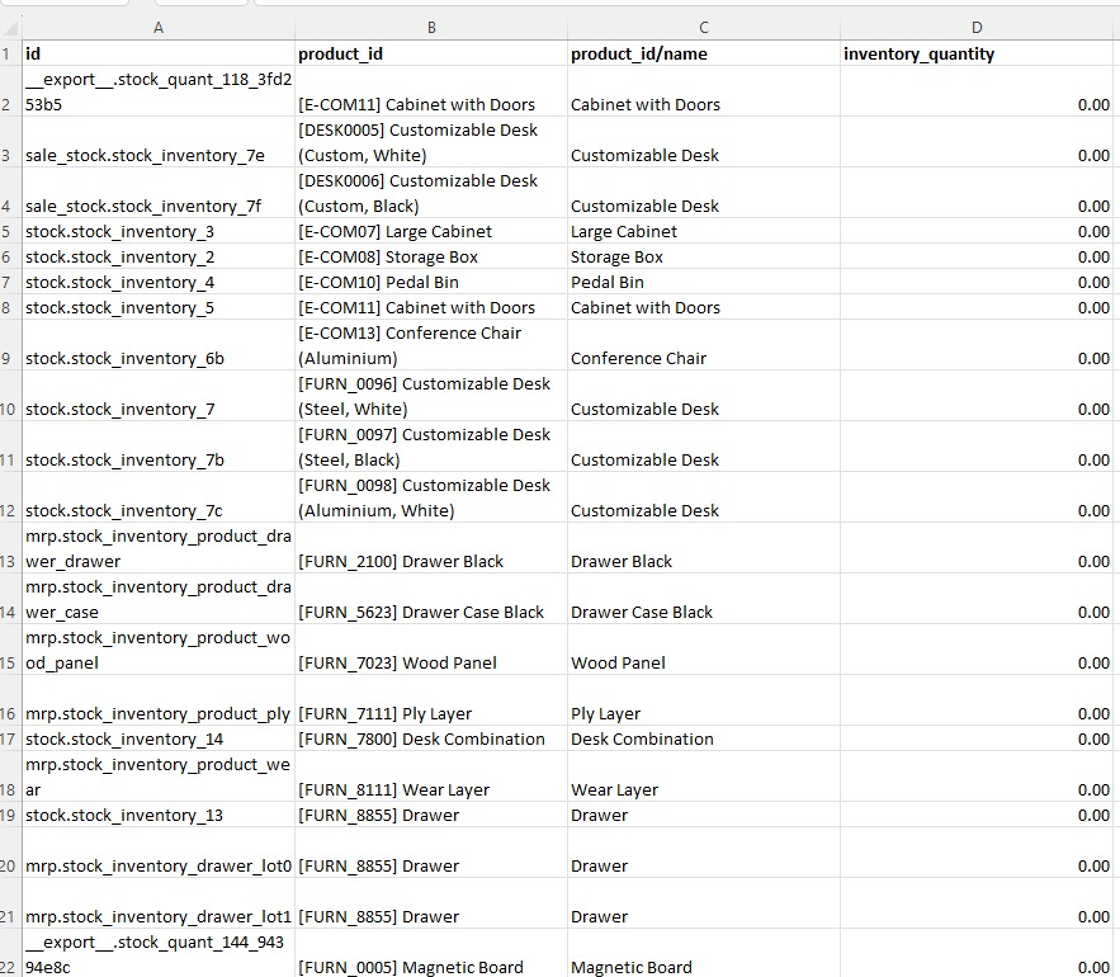
For uploading this spreadsheet the you need at least the "Product ID" and the "Counted Quantity"
14. View below of spreadsheet.
15. You can count and add the counted quantities in the "Inventory Quantity" column. Save the spreadsheet with a name you can remember.
IMPORTANT: The system exports all the selected products at a counted quantity of "0". If you do not count an item and then upload this spreadsheet without removing the item it will set the quantity to "0".
You do not have to upload all the rows that you exported. If you do not need to update a product you can simply remove it from the list before exporting.
NOTE: Products that have a quantity on hand of "0" do not show up in the inventory adjustment report. They can be manually added in the report, but they will not show up in the spreadsheet. If you need to count an item that has an on hand quantity of zero you will need to do that in the system and not on the spreadsheet.
16. Click this checkbox to deselect the items.

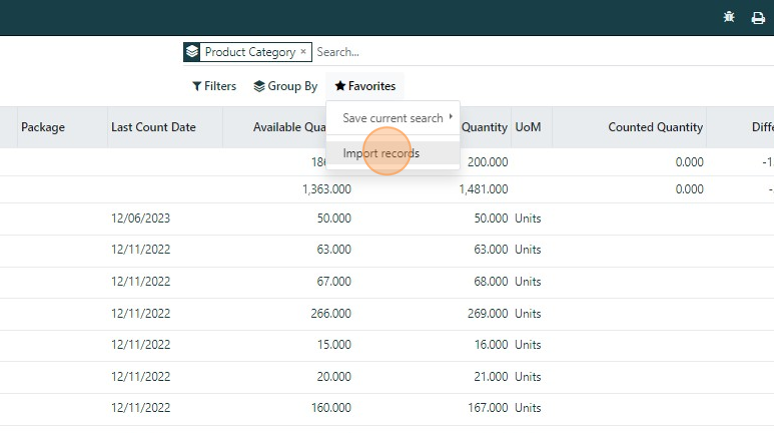
17. Click "Favorites"
18. Click "Import records"
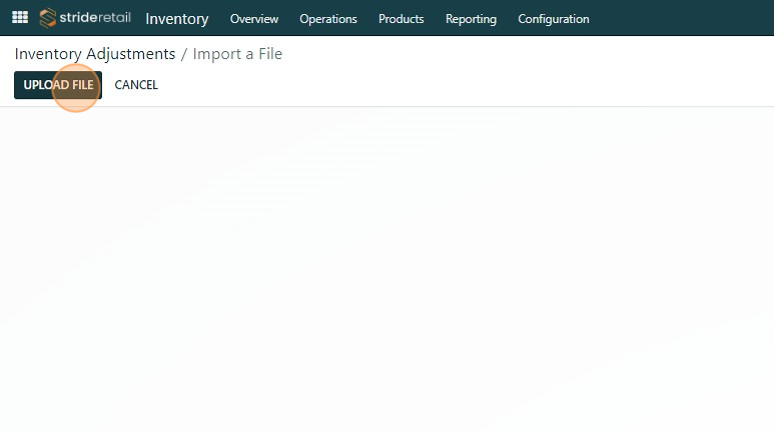
19. Click "UPLOAD FILE" and select the file you want to upload for the inventory adjustment.
20. When uploading you only need the External ID and the "Counted Quantity."
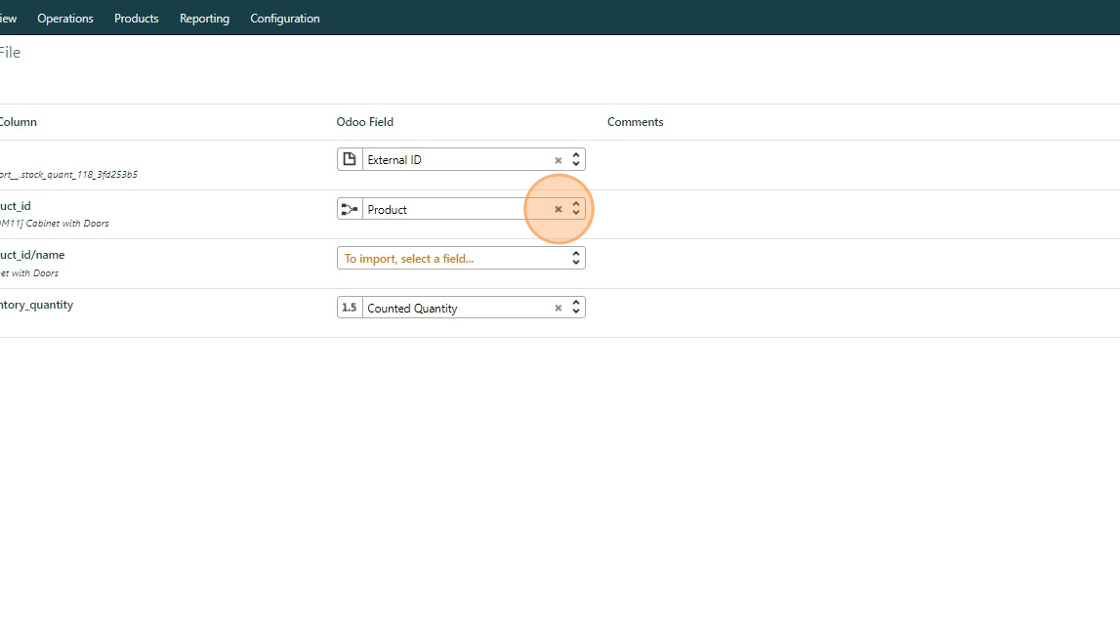
21. Click "TEST" if you want to.
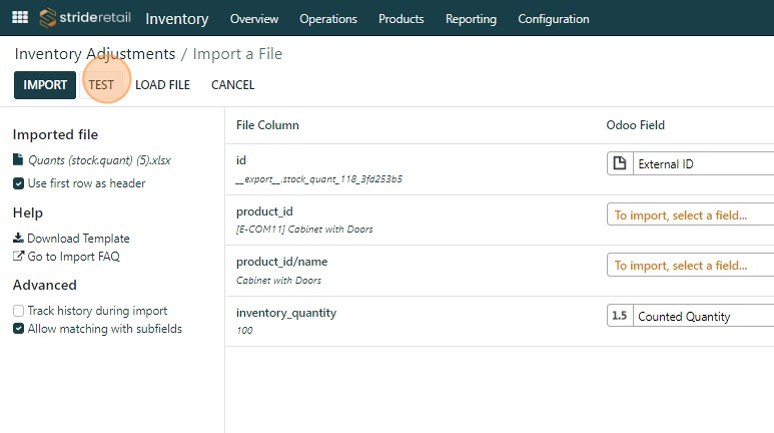
22. Click "IMPORT" once your test is successful.

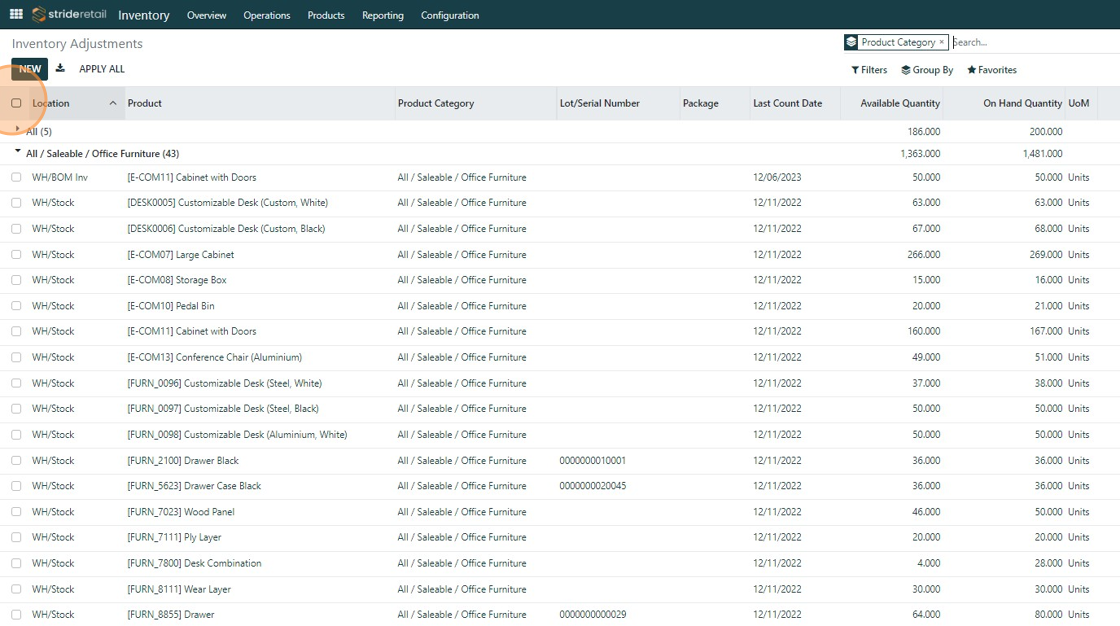
23. Click this checkbox to select all the items that you recently uploaded.
24. Click "APPLY ALL"
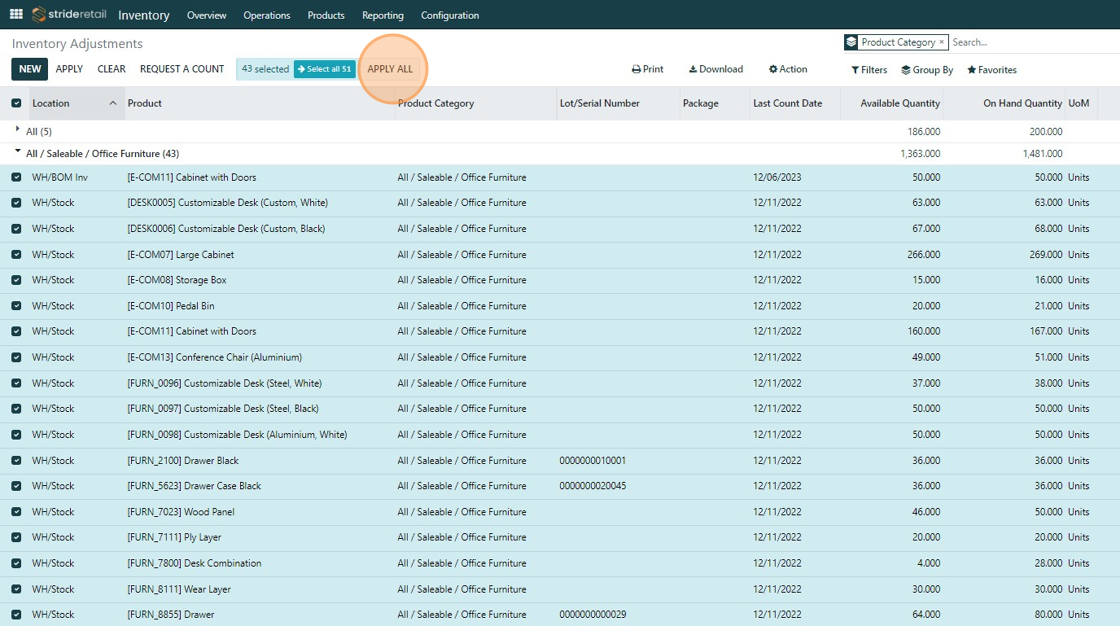
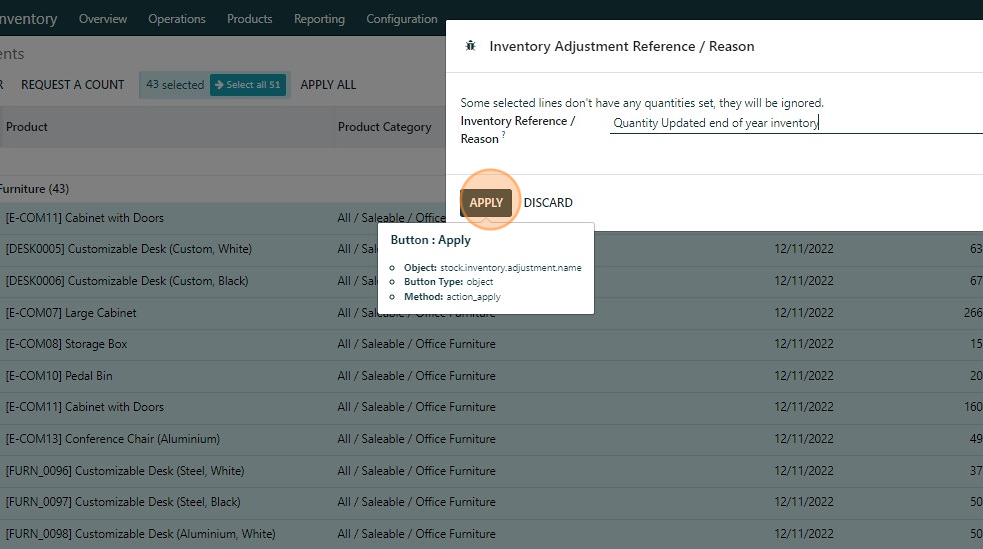
25. A dialogue box appears. Give this adjustment a reference/reason and hit apply.
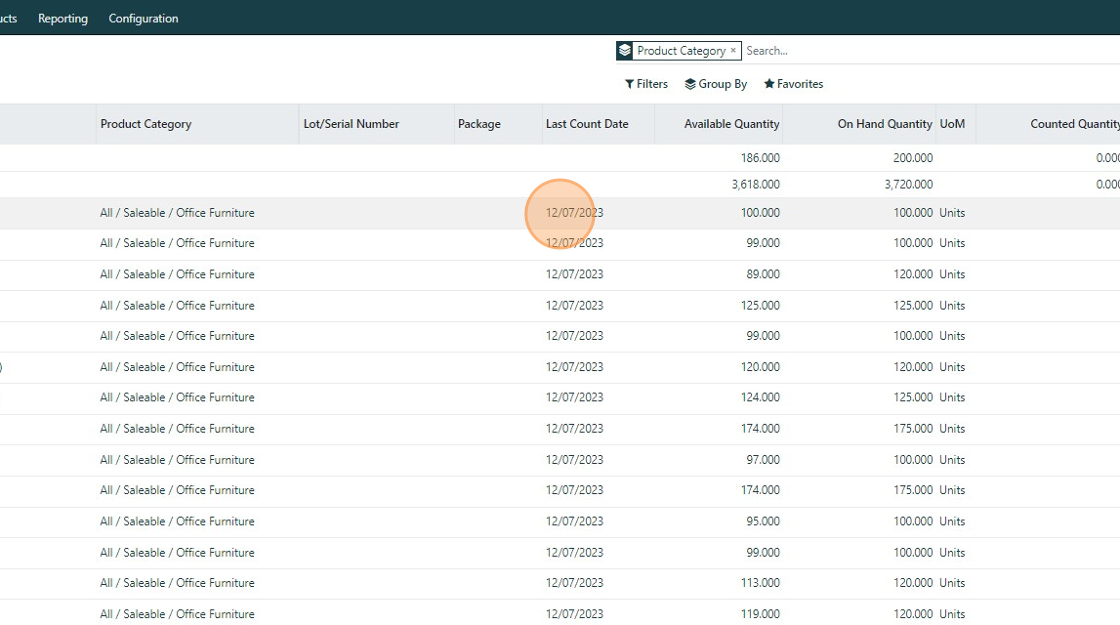
26. Now the "Last Counted Date" has changed to the latest date. If needed you can sort products based on their "Last updated on" date.
27. Final view.